Configuration
It can often be overwhelming to start working with a new starter project. If you provide us with some details about your project, we can generate a baseline configuration for deployment to AWS.
The following properties are required for general project configuration:
- Project Name: A name for this project.
- Deployment: Choose if you want to use the configuration tool to configure production or development infrastructure. At this point, the configuration tool only supports definition of either production or development infrastructure. However, after you download your project, you can configure unlimited additional deployment configurations (for example if you choose to define development infrastructure now, you can define production infrastructure later).
- AWS Region: The AWS region infrastructure that your project should be deployed to.
AWS Configuration
In order to set up infrastructure on AWS and for running deployed services, Goldstack needs access to AWS credentials. These can be provided in a number of ways:
Using the default local AWS user
If you have the AWS CLI installed and have credentials configured locally, Goldstack will use the default AWS user if no other configuration options are provided.
You can check if the default AWS user is configured by running aws configure list.
aws configure list
Using a specific local AWS user
The AWS CLI uses a standardised location to store AWS credentials and configuration. Goldstack will attempt to read from this configuration if no other configuration was provided.
Please see the AWS documentation to learn more about where these files are stored and how to create them: AWS CLI / Configuration and credential file settings.
Note that Goldstack will require both the credentials as well as the config file, and in the config file specifically the region needs to be specified.
Goldstack will use the default profile if no profile is specified. If you want to use more than one profile (e.g. for different deployment stages) you can use the Goldstack AWS configuration file. This file is stored in the repository in the following location:
config/infra/aws/config.json
You can define a number of different users as follows:
{
  "users": [
    {
      "name": "dev",
      "type": "profile",
      "config": {
        "profile": "default",
        "awsDefaultRegion": "us-west-2"
      }
    },
    {
      "name": "prod",
      "type": "profile",
      "config": {
        "profile": "prod",
        "awsDefaultRegion": "us-west-2"
      }
    }
  ]
}
Note that Goldstack also supports overriding the path of the default AWS configuration and credentials files:
{
  "users": [
    {
      "name": "prod",
      "type": "profile",
      "config": {
        "profile": "prod",
        "awsDefaultRegion": "us-west-2",
        "awsConfigFileName": "/path/to/config/file",
        "awsCredentialsFileName": "/path/to/credentials/file"
      }
    }
  ]
}
Using process credentials
There are a number of issues when trying to work with multiple profiles and SSO credentials, see aws/aws-cli#4982 (comment) and goldstack/goldstack#17.
An excellent way to deal with situations where we do not want to provide the user credentials directly is to use process credentials.
Goldstack supports defining process credentials in the config/infra/aws/config.json file.
"users": [
    {
      "name": "dev-user",
      "type": "profile",
      "config": {
        "profile": "with-process",
        "awsDefaultRegion": "us-west-2",
        "credentialsSource": "process"
      }
    }
  ]
This will require a ~/.aws/config file as follows:
[with-process]
credential_process=[your command]
Useful commands to use in the credential_process field are: aws-sso-creds-helper, aws-sso-util, aws-vault and aws2-wrap.
Note that it is also possible to place the credentials file in a different location.
{
  "users": [
    {
      "name": "prod",
      "type": "profile",
      "config": {
        "profile": "prod",
        "awsDefaultRegion": "us-west-2",
        "awsConfigFileName": "/path/to/config/file",
        "credentialsSource": "process"
      }
    }
  ]
}
Using credentials in Goldstack configuration file
AWS credentials they can be configured directly in the Goldstack configuration file. Note we do not recommend this option. If you can, use the user credentials or environment variables.
This file can be found under the following paths:
config/infra/aws/config.json
The configuration file can have contents as follows:
{
  "users": [
    {
      "name": "dev-user",
      "type": "apiKey",
      "config": {
        "awsAccessKeyId": "[Your Access Key ID]",
        "awsSecretAccessKey": "[Your Secret Access Key]",
        "awsDefaultRegion": "[Region for user]"
      }
    },
    {
      "name": "prod-user",
      "type": "apiKey",
      "config": {
        "awsAccessKeyId": "[Your Access Key ID]",
        "awsSecretAccessKey": "[Your Secret Access Key]",
        "awsDefaultRegion": "[Region for user]"
      }
    }
  ]
}
Make sure that the "name" property matches the "awsUser" of module deployments for which the user should be used. There is no limit to how many users you can define.
Note that this file should not checked into source control if AWS credentials are provided.
If you want to supply AWS user credentials in your CI/CD systems, these can be supplied using environment variables and for local development you can use the files provided by the AWS CLI (see above).
Credentials in Environment Variables
Goldstack can read AWS Access Key ID and Secret Access Key from environment variables. The easiest way is to set the following environment variables:
AWS_USER_NAME: [Your user name]
AWS_ACCESS_KEY_ID: [Your access key id]
AWS_SECRET_ACCESS_KEY: [Your secret access key]
AWS_DEFAULT_REGION: [User region]
The AWS_USER_NAME variable is optional but can be useful for explicitly referencing the correct Goldstack user in deployments. The above setup is particularly useful for CI/CD environments. For instance, when using GitHub Actions, environment variables could be configured as follows:
- name: Deploy UI
  run: |
    yarn workspace my-ui deploy dev
  env:
    AWS_USER_NAME: dev-user
    AWS_ACCESS_KEY_ID: ${{secrets.AWS_ACCESS_KEY_ID}}
    AWS_SECRET_ACCESS_KEY: ${{secrets.AWS_SECRET_ACCESS_KEY}}
    AWS_DEFAULT_REGION: us-west-2
The values of the environment variables are defined in GitHub Secrets.
How to get AWS Credentials
The easiest way to configure the AWS user for Goldstack is to do it during project setup by providing an AWS Access Key Id and AWS Secret Access Key. To obtain these, please do the following:
- Create an AWS account if you do not already have one. See instructions on this from AWS here.
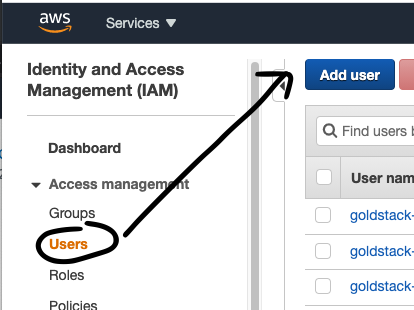
- Open the AWS console IAM management and sign in if required: https://console.aws.amazon.com/iam/home?region=us-east-1#/home
- Click on Users in the menu on the right
- Provide a username of your choice, for instance 'goldstack-dev'
- Select the Access Type Programmatic Access
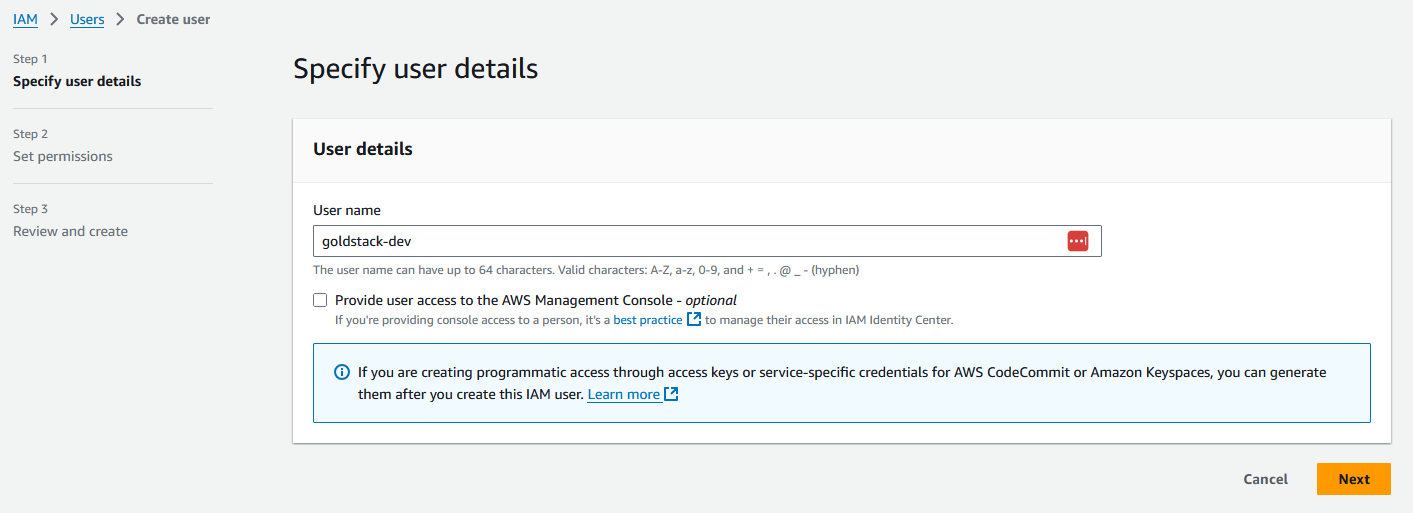
- Click on the button Next: Permissions
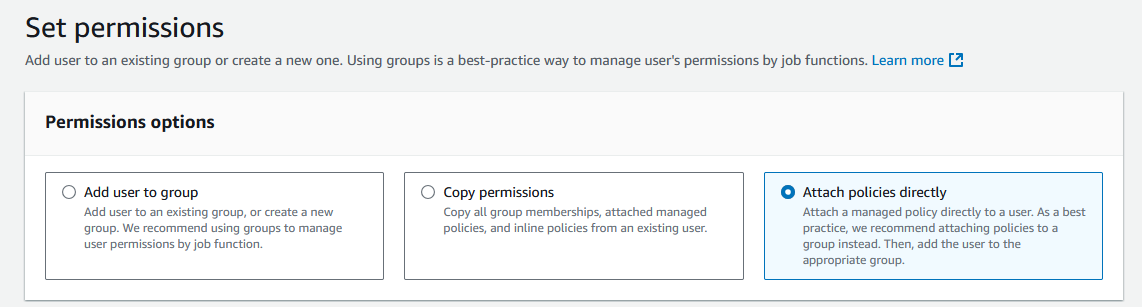
- Select Attach existing policies directly
- Select the Policy AdministratorAccess
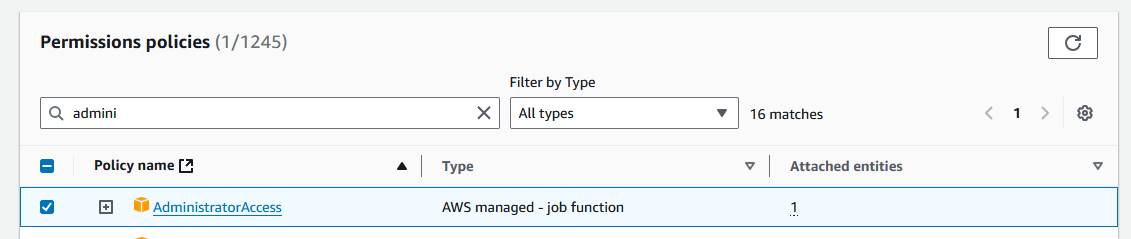
- Click on the button Next
- On the review page click Create user
- Click on the name of the user you have just created
- Then click on the tab Security credentials

- Scroll down to Access Keys and click Create Access Key
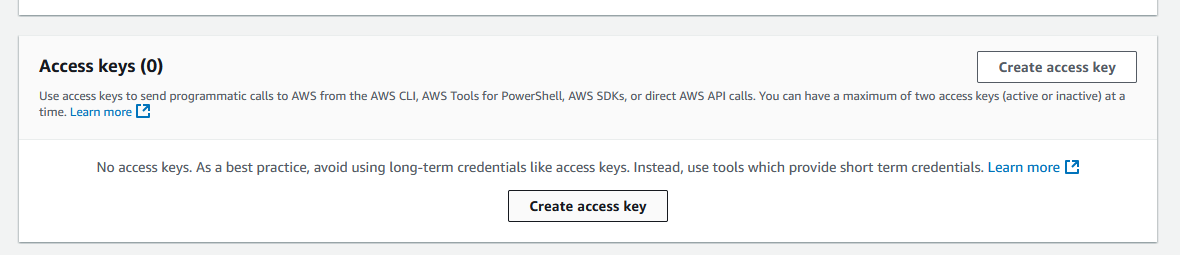
- Select Local code and check the box under Confirmation, and click Next
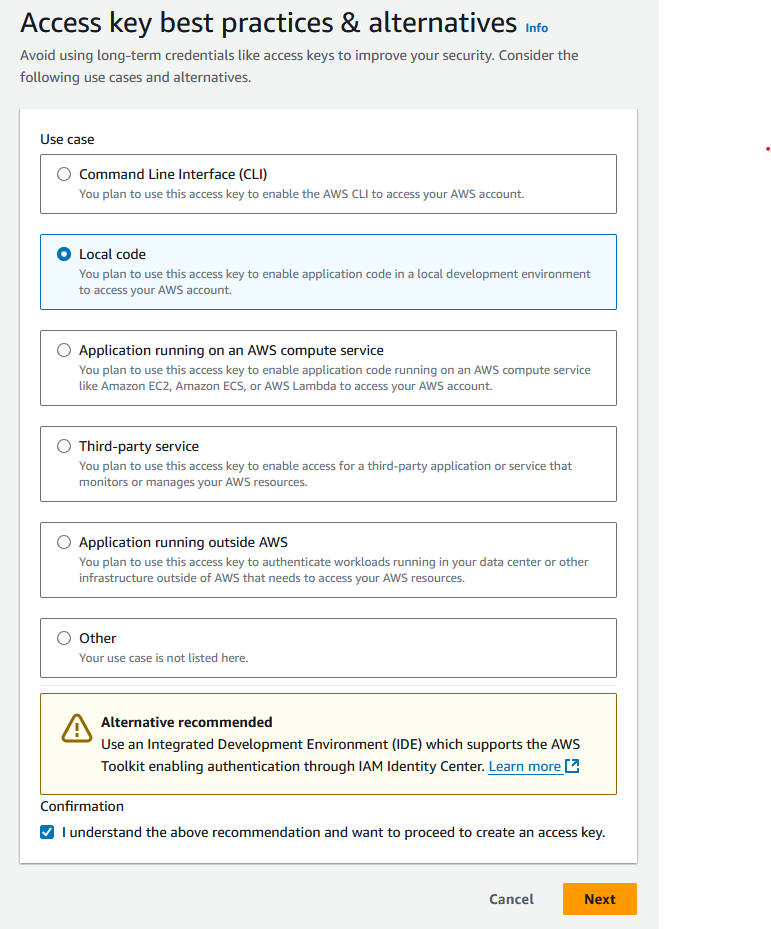
- You do not need to provide a description tag value. Click Create access key.
Now you can copy the Access Key ID and add it to the Goldstack configuration form or add it into your local configuration file. Do the same with the Secret Access Key (It can be shown by clicking on Show).
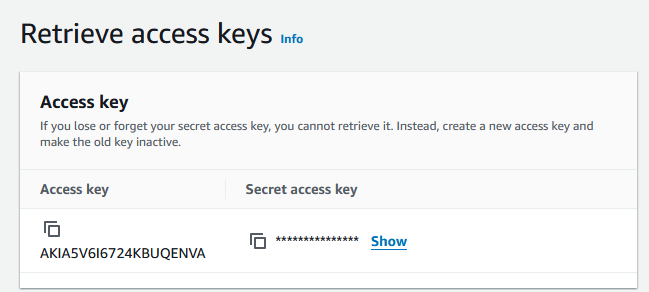
Note that it is recommended to only provide this key and secret for development systems (and prototype/hobby production systems). For all other systems, it is recommended to provide this key and secret only through environment variables (see below).
Hosted Zone Configuration
Many templates need to deploy resources to a domain, for instance for a static website or for an API server. Goldstack templates can provide the DNS configuration required but you need to specify the Route 53 hosted zone that the DNS entries should be added to. You can either use an already existing hosted zone or create a new one.
Creating a new hosted zone
The following steps describe how to create a new hosted zone in AWS Route 53.
- (Optional) If you haven't registered a domain, you can register a domain through Route 53.
- Go to the Route 53 AWS console
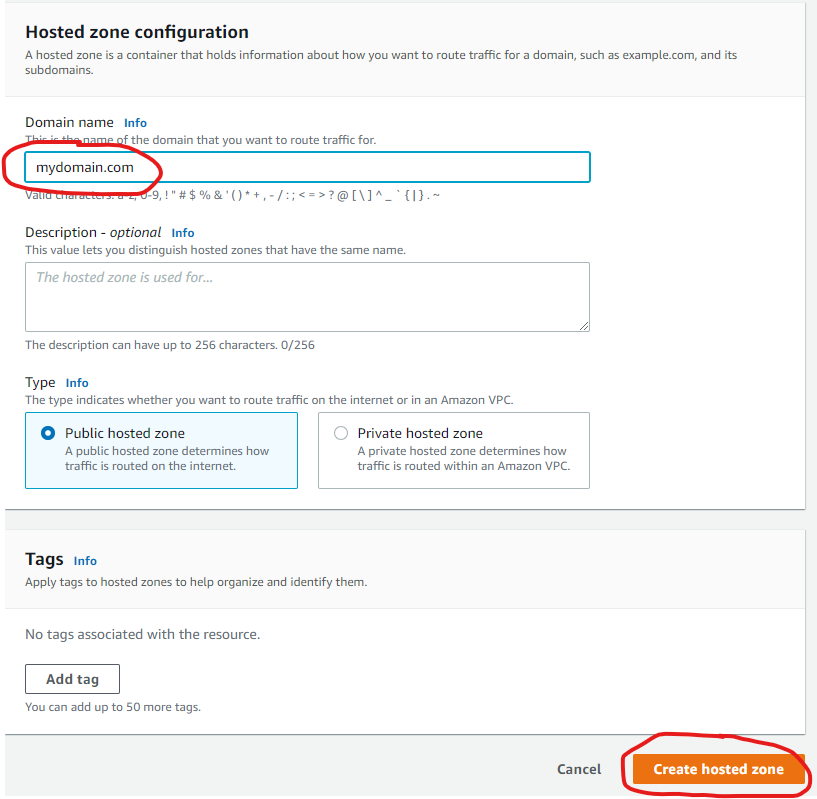
- Click on Create Hosted Zone
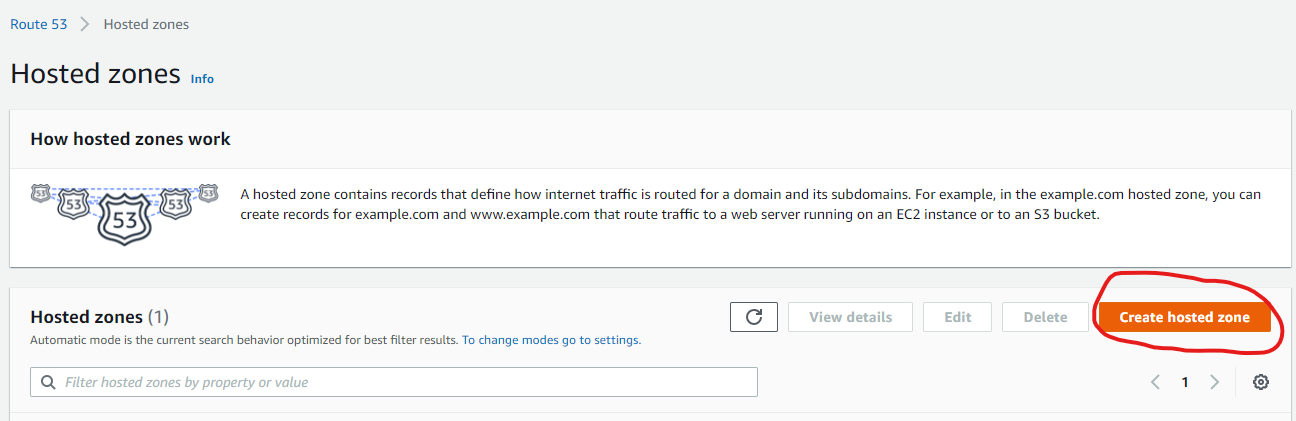
- Provide the name of a domain you own (or a subdomain of a domain you own) and click Create hosted zone.
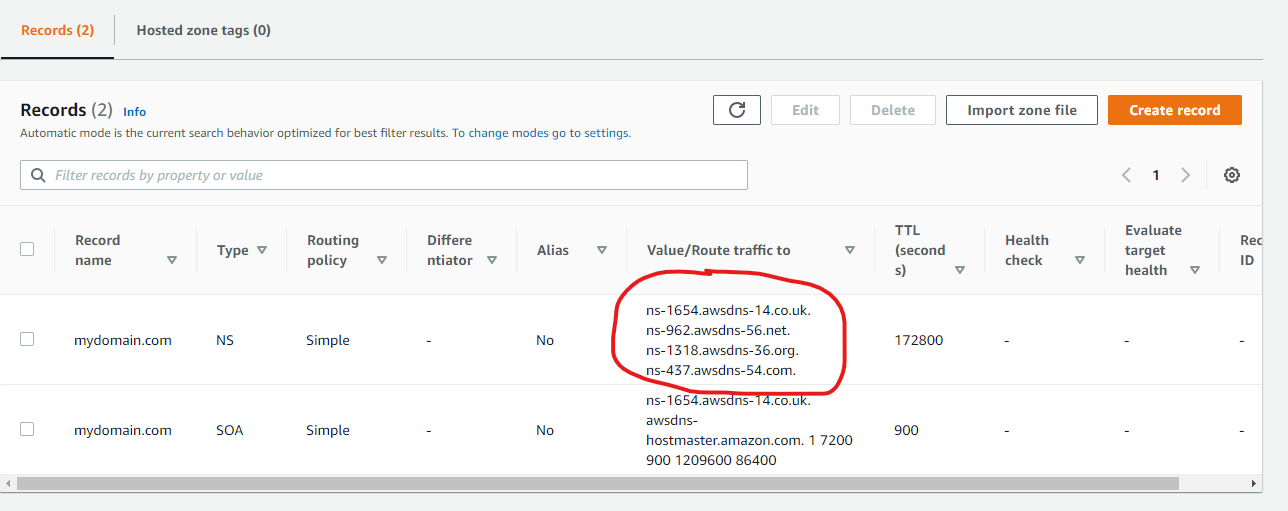
- If you haven't registered your domain through Route 53, configure your domain with your domain registrar to use the nameservers Route 53 lists for your domain.
Now you can copy the domain name of your hosted zone and provide this in your template configuration

Note that for the actual domain your package uses, you can specify the domain name of the hosted zone directly, or one of it's subdomains. For instance, if your hosted zone domain is yourdomain.com you can configure a website template to be deployed to yourdomain.com or website.yourdomain.com.
You can use the same hosted zone for multiple modules. Just make sure to use subdomains to avoid conflicts between packages. For instance, if you configure a website to be deployed to mydomain.com then deploy your API to api.mydomain.com.
Using an existing hosted zone
If you already have a hosted zone configured for the domain you would like to use for your template, you simply need to provide the domain of the hosted zone.
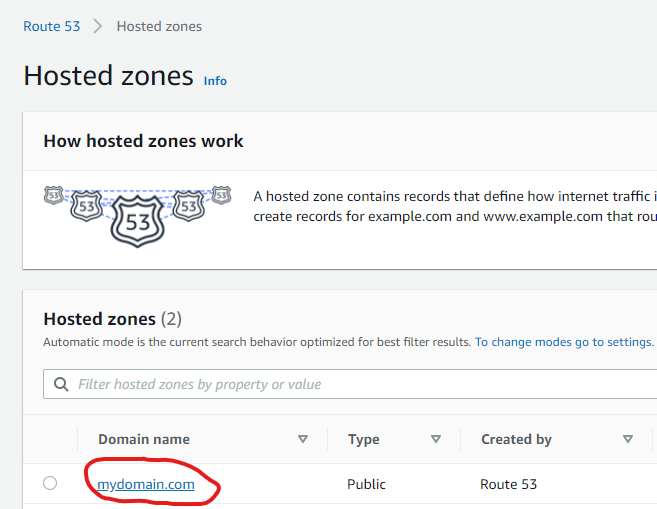
- You can find all hosted zones you have configured in the Route 53 Console
- Copy the value provided under Domain name and provide this in your template configuration
Terraform
All Goldstack templates contain Terraform Infrastructure as Code definitions. Goldstack provides easy tooling to stand up this infrastructure. Terraform will use the AWS credentials configured as per the instructions above.
All state will be stored in Terraform S3 remote state using DynamoDB locking. Goldstack will automatically create a bucket for storing the state in the same AWS account that the infrastructure is deployed to (thus being able to use the same AWS credentials).
During standing up the infrastructure for the first package of a project, Goldstack will create the config/infra/aws/terraform.json file that contains the S3 bucket and DynamoDB table for all packages deployed to a respective AWS account. Below an example terraform.json file.
{
  "remoteState": [
    {
      "user": "dev",
      "terraformStateBucket": "goldstack-tfstate-67a73e60720c25855a39baeb1218b55229578671",
      "terraformStateDynamoDBTable": "goldstack-tfstate-a82076777995c7254fbcae1f9e8013fee75833f2-lock"
    },
    {
      "user": "prod",
      "terraformStateBucket": "goldstack-tfstate-0cb1a35a83c9c952321ee4addbe76d096b031d47",
      "terraformStateDynamoDBTable": "goldstack-tfstate-0cb1a35a83c9c957772ee4addbe76d096b031d47-lock"
    }
  ]
}
To prevent Goldstack from auto-generating the bucket and table names, provide a terraform.json file before standing up the infrastructure for your first package. Goldstack will create bucket and table using the names you specify then. Also, if you have special requirements for your bucket and table, you can create these before standing up the infrastructure with Goldstack. You only need to ensure that the bucket and table fulfil the requirements of Terraform for storing its remote state.
All packages included in a project will use the same bucket and DynamoDB table. The name of the state file will be defined in the goldstack.json file within each package.
{
  "$schema": "./schemas/package.schema.json",
  "name": "mypackage",
  "deployments": [
    {
      "name": "dev",
      "tfStateKey": "mypackage-dev-f53056a8788c8eb7a1ac.tfstate"
    }
  ]
}
If the tfStateKey property is defined before running yarn infra init [deployment], Goldstack will use the name specified as key for the state in bucket and DynamoDB table. If the tfStateKey property is not defined, a name will be generated and goldstack.json updated.
Ensure that after standing up infrastructure for the first time to commit and push changes to your project, since Goldstack will update goldstack.json config and the config/infra/aws/terraform.json config. This is only required for initialising the infrastructure for each package and target AWS account (and if you do not provide the names for bucket, table and state files manually). For subsequent updates to the infrastructure it is not necessary to update the source files.
Upgrading Terraform Version
Terraform frequently releases new versions of their tooling. Goldstack provides tooling to support different versions of Terraform for different modules and for upgrading Terraform.
⚠️ Note that upgrading Terraform is often a difficult process and although Goldstack provides some tools to make this process easier, expect that a number of manual steps and fixes will be required.
First note that Goldstack allows defining the version of Terraform that is to be used for executing infrastructure commands in two ways:
- Centrally for a package using a file
infra/tfConfig.jsonsuch as the following:
{
  "tfVersion": "1.10"
}
- If a project has multiple different deployments that require different Terraform versions, or for first upgrading Terraform for test environments, it is also possible to specify the Terraform version per deployment. For this, add the
"tfVersion"property to a"configuration"for a deployment ingoldstack.json, for instance:
{
  "$schema": "./schemas/package.schema.json",
  "name": "lambda-api-template",
  "template": "lambda-api",
  "templateVersion": "0.1.0",
  "configuration": {},
  "deployments": [
    {
      "name": "prod",
      "awsRegion": "us-west-2",
      "awsUser": "goldstack-dev",
      "configuration": {
        "tfVersion": "1.10"
      }
    }
  ]
}
Changing the Terraform version will result in Goldstack using the specified version of the Docker image hashicorp/terraform:[version]. Please avoid specifying minor versions: use 0.12 not 0.12.1.
Note that Terraform often provides upgrade scripts for Terraform. These can either be applied by installing the matching Terraform version locally or using the following Goldstack command:
yarn infra upgrade [deployment] [targetVersion]
Note that this command is only supported for a limited number of versions. Also versions need to be upgraded one jump at a time, e.g. going from 0.12 to 0.13 is supported but not going from 0.12 to 0.14 or higher versions. For a reference of available versions, see Terraform Versions.
It is recommend to run yarn infra init [deployment], yarn infra up [deployment] and yarn deploy [deployment] after every upgrade command.
Note that you may have to upgrade various versions in infra/aws/terraform/providers.tf as well as making various other changes upgrading Terraform may involve, also see Terraform Upgrade Guides.
Releasing State Locks
Goldstack automatically creates Terraform state files on S3 and maintains a state lock using DynamoDB. Sometimes Terraform state can become locked if an operation fails unexpectedly. When performing further Terraform operations, an error as the following will be reported:
│ Error: Error acquiring the state lock
│
│ Error message: ConditionalCheckFailedException: The conditional request
│ failed
│ Lock Info:
│   ID:        37ce96a7-3689-8630-f346-9f1e745c038b
│   Path:      goldstack-tfstate-f865b5cbbebb107ee7639f77a95b6f46c814fff9/env:/prod/server-side-rendering-prod-9241dfab78652931e675.tfstate
│   Operation: OperationTypeApply
│   Who:       root@f3f77f0e8b44
│   Version:   1.1.3
│   Created:   2022-10-07 22:05:04.2574526 +0000 UTC
│   Info:
To resolve this error, take note of the ID above and the deployment for which the state file has been locked and run the command:
yarn infra terraform [deployment] force-unlock -force [ID]
Destroying State
Goldstack provides commands to clean up Terraform state. These commands are useful when you want to completely remove a deployment or reset your infrastructure configuration.
⚠️ Important: All packages in a project share the same S3 bucket and DynamoDB table for storing state. The state for each deployment is stored in a separate file identified by the tfStateKey in goldstack.json.
Destroy Deployment State
To delete only the state file for a specific deployment:
yarn infra destroy-state [deployment]
This command:
- Deletes the
.tfstatefile for the specific deployment from S3 - Removes the lock entry for that deployment from DynamoDB
- Does not affect other deployments or the shared infrastructure
This is the recommended way to clean up state for a single deployment.
Destroy State Bucket
⚠️ DANGER: This command affects ALL deployments in your project.
To delete the entire S3 bucket and DynamoDB table used for Terraform state:
yarn infra destroy-state-bucket [deployment]
This command:
- Deletes ALL state files from the S3 bucket
- Deletes the DynamoDB table used for state locking
- Affects every deployment that uses the same AWS account
When to use this command:
- When you want to completely remove all Terraform state infrastructure
- During project cleanup when you're sure no deployments need their state
- When migrating to a different state management solution
Confirmation required: You must type destroy-bucket when prompted to confirm this destructive operation.
Note: After running destroy-state-bucket, you will need to run yarn infra up [deployment] again for any deployment, which will recreate the bucket and table.
Providing Terraform Variables
Terraform variables can be defined in multiple ways. Variables are discovered from the variables.tf file in your infra/aws folder, and their values can be provided through:
goldstack.jsonconfiguration files (recommended for most values)- Environment variables (
process.env) .envfiles (useful for sensitive values)
Important: Variables defined in variables.tf do not need to be present in goldstack.json. If a variable is not defined in goldstack.json, Goldstack will automatically attempt to resolve its value from environment variables or .env files. This is particularly useful for sensitive values that should not be committed to source control.
Using goldstack.json
Define variables in the configuration property of your goldstack.json. There is one global configuration property that applies for all deployments, and each deployment can have its own configuration property:
{
  "configuration": {
    "myVar": "global-value"
  },
  "deployments": [
    {
      "name": "prod",
      "configuration": {
        "myVar": "prod-specific-value"
      }
    }
  ]
}
Using Environment Variables
You can provide Terraform variable values directly through environment variables. For a variable named my_var in variables.tf, set the environment variable MY_VAR:
MY_VAR=value yarn infra up prod
This works well in CI/CD pipelines with secrets:
- name: Deploy
  run: yarn workspace my-package infra up prod
  env:
    MY_VAR: ${{ secrets.MY_SECRET }}
Using .env Files
Goldstack loads .env files from both the monorepo root and the package directory in the following order (later files override earlier ones):
root/.env- Shared across all deploymentsroot/.env.[deployment]- Deployment-specific (e.g.,.env.prod,.env.dev)package/.env- Package-specific shared valuespackage/.env.[deployment]- Package and deployment-specific (highest priority)
For example, if you have a Terraform variable my_var defined in variables.tf, you can provide its value via a .env file:
# .env.prod
MY_VAR=my-value
The environment variable name should be uppercase with underscores matching the Terraform variable name (e.g., my_var → MY_VAR).
Variable Resolution Priority
When resolving Terraform variable values, Goldstack uses the following priority (from highest to lowest):
- Values defined in
goldstack.jsonconfigurations - Environment variables (
process.env) - Values from
.envfiles
If a variable defined in variables.tf is not found in any of these sources, a warning will be logged and the variable will not be passed to Terraform.